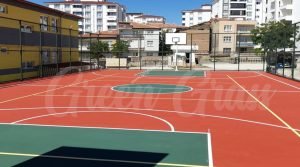
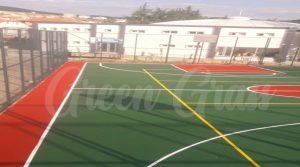
Self-Leveling for Medical Vinyl
Self-leveling compound, also known as “self-leveling,” is a magical solution for floor preparation. No delicate flooring, such as medical vinyl, epoxy, or even parquet, can be perfectly installed without this material.
Here’s a detailed article on how self-leveling works from Greengrass Group:
Self-Leveling: The Art of Preparing the Perfect Floor from Greengrass Group
Why Do We Need Self-Leveling?
In the world of construction and decoration, a level floor is the foundation of any successful finish. New or old concrete floors often contain imperfections, cracks, bumps, or unwanted dips. These imperfections not only harm the aesthetic appearance but can also cause the failure of thin-layer flooring (such as vinyl) or cracking of hardwood tiles.
This is where self-leveling compound comes in. It’s an advanced, fast-drying cementitious material with superior flow and spreading properties, creating a perfectly horizontal and level surface with minimal effort.
What is Greengrass Group’s self-leveling compound and how does it work?
Self-leveling compound is a mixture of Portland cement, fine sand, modified polymers, and chemical additives. Its primary feature is its high fluidity when mixed with water.
“Self-leveling” mechanism: From Greengrass Group
When the wet mixture is poured onto the floor:
* High fluidity: The low viscosity allows the material to flow easily across the surface.
* Gravity: Gravity pulls the material and spreads it evenly, filling all depressions and gaps.
* Horizontal spreading: The material stops flowing only when it reaches a stable horizontal level (similar to the surface of water), eliminating the need for extensive manual leveling with trowels.
* Rapid hardening: Most types of self-leveling harden quickly, allowing for easy application and the final floor installation to proceed within a few hours.
Steps for installing self-leveling from Greengrass Group
Applying self-leveling is not a simple matter of mixing and pouring; it requires careful preparation to ensure the best results:
Step 1: Preparation and Cleaning (Key to Success)
* Thorough cleaning: All dirt, oils, waxes, and old adhesives must be removed. The surface must be thoroughly vacuumed.
* Crack sealing: Seal any large cracks or holes in the concrete using appropriate repair materials to prevent the leveling compound from seeping down.
* Primer application: This step is crucial. A coat of primer suitable for the leveling compound (usually an acrylic primer) must be applied to the substrate. The primer:
* Improves the adhesion of the leveling compound to the surface.
* Prevents the concrete from absorbing water too quickly from the leveling compound, which could weaken its strength.
Step 2: Thorough mixing
* Water measurement: Strict adherence to the water ratio specified on the product package must be adhered to. Adding too much water increases fluidity but weakens the material’s strength and leads to cracking.
* Mechanical Mixing: Use a high-speed electric mixer (attached to an electric drill) and a mixing paddle to ensure rapid and efficient mixing of the material to produce a homogeneous, lump-free mixture. A sufficient quantity should be mixed to be poured and distributed within 10-15 minutes before the material begins to harden.
Step 3: Pouring and Distributing
* Pouring: Start pouring the material from the farthest point in the chamber and allow the material to flow “self-contained.”
* Spiking: Use a spiked roller or two gauge rakes. The goal is not to “level” the material manually, but rather to distribute it and break up any air bubbles that may be trapped in the mixture.
* Spiked Shoes: The worker must wear spiked shoes to walk on the wet material while working without leaving marks.
Step 4: Drying and Curing
* Protection: The surface must be protected from strong air currents or direct sunlight during the drying phase to avoid surface cracks.
* Waiting: Carefully follow the manufacturer’s instructions regarding the drying time before walking on the surface and the curing time required before installing the final floor (often ranging from 4 to 24 hours depending on the thickness and type).
Finally… A perfect floor starts with a level foundation, and that’s what we at Greengrass Group offer.
Self-leveling is a modern technology that has transformed floor preparation from a difficult and time-consuming task into a quick and precise process. Whether you’re preparing to install medical-grade vinyl in a hospital or luxury tiles in a home, investing the time and effort to properly apply self-leveling ensures a millimeter-level surface, reflecting the quality and professionalism of the final finish.